Planting trees is a great way to increase the appeal and appearance of your property on top of their positive impact on the environment. It also improves your privacy by creating a soft screen without the need for a fence.
Autumn and early winter is the perfect time to plant trees. The colder seasons allow young trees to establish roots and grow without the stress of the Summer heat.
Before planting, it’s essential to research and find the best trees to grow in your area and climatic conditions.
To complete the work yourself, you will need the following materials and tools:
- Trees
- Rake
- String line
- Spray paint
- Spade
- Shovel
- Weed Mat
- Plastic/Metal Pegs
- Knife
- Slow-releasing fertiliser tabs
- Soil
- Mulch
We offer planting services as well as tree pruning and removal services. So if you need help selecting and planting trees, feel free to contact us when you are ready.
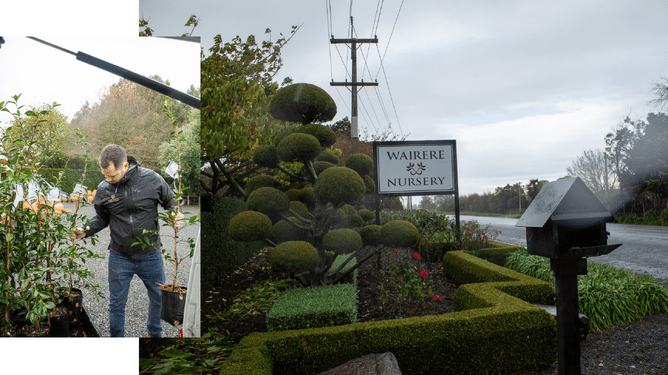
Step 1: Purchase Trees From Nursery
Once you have researched and selected the suitable trees for your property, we recommend purchasing them from a trusted nursery.
We suggest purchasing your trees from Wairere Nursery if you live in the Waikato area.
Why choose Wairere Nursery?
- The staff is very knowledgeable;
- They have a great selection of trees;
- They have a lovely garden, well worth a visit;
- The stock quality is excellent.
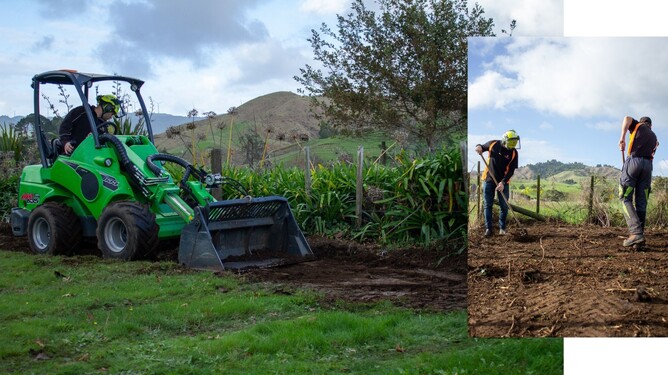
Step 2: Level The Ground
Level and prepare the ground as once the hedge is planted, the lay of the land will be permanent.
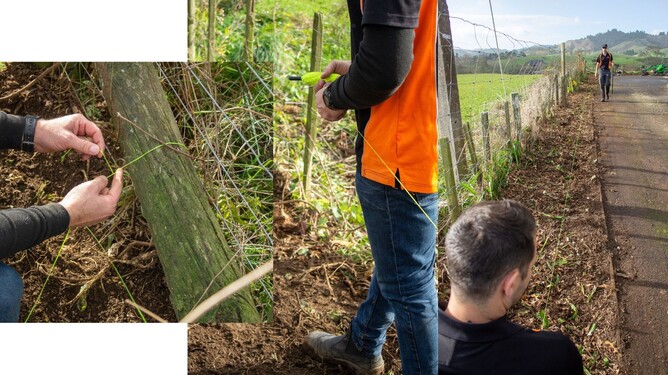
Step 3: Install A String Line
This step only applies if you are planting trees to create a hedge.
Ensure the string line is tight and straight.
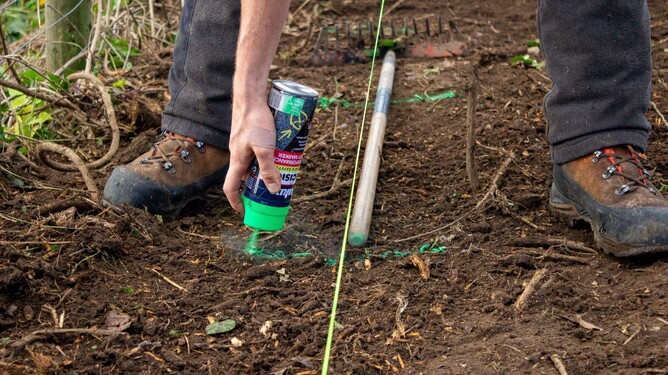
Step 4: Measure & Mark The Planting Area
Before digging the holes, measure and mark a cross sign on the ground with spray paint.
Tips:- For hedging, the trees should be 1 metre apart (depending on the plant’s size).
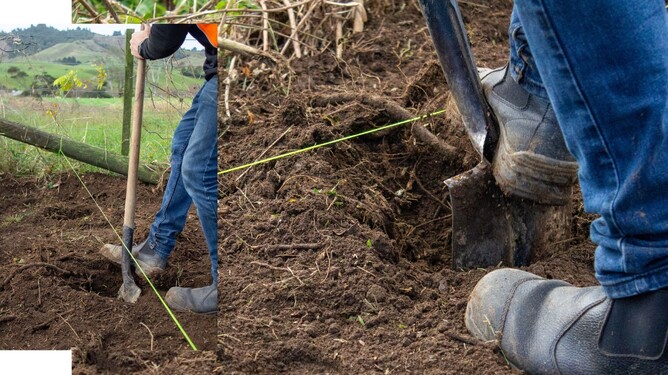
Step 5: Dig Holes
Dig square holes 30-40mm deeper than needed. The square pit stops the roots from growing in a circular motion and strangulating themselves over time (root girdling).
Tips:
- The hole's width must be approximately twice the diameter of the tree's pit, so you can get your fists down the side of the root ball.
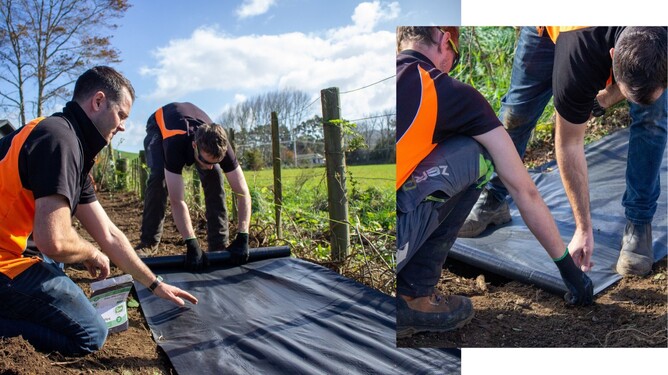
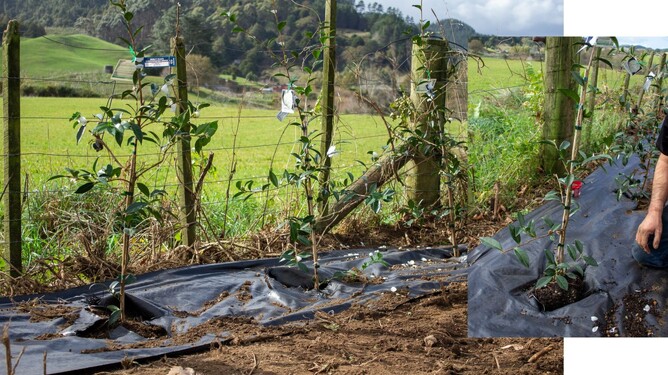
Step 6: Add Weed Mat
Roll the weed mat out over the holes and firmly secure it using matting pegs.
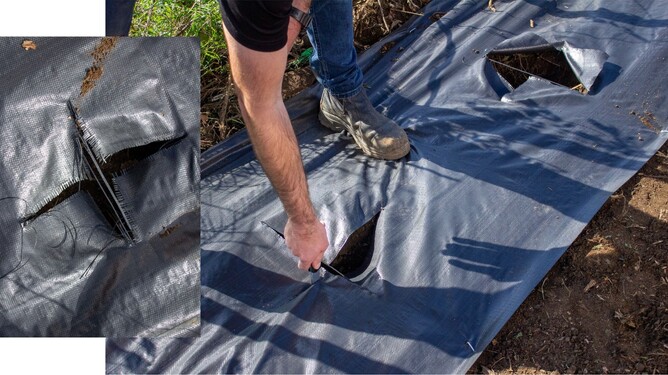
Step 7: Cut Holes In The Mat To Plant Trees
Cut an “X” shaped hole with a knife on top of the dug holes.
Tips:
- Be sure to cut the cross in the middle of each spot, making it a lot easier to plant.
Notes:
- You can reverse steps 5, 6 & 7; add the weed mat first, cut holes in the weed mat and then dig holes in the ground. It was easier for us to dig holes in the ground and apply the weed mat for this job.

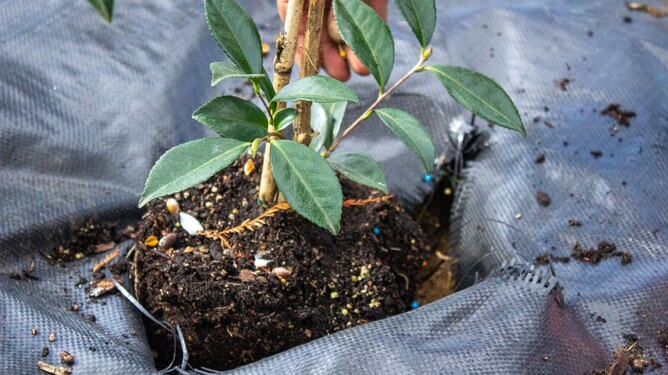
Step 8: Remove The Tree From Bag
Remove the plant from the plastic root bag and dispose of the bag correctly.
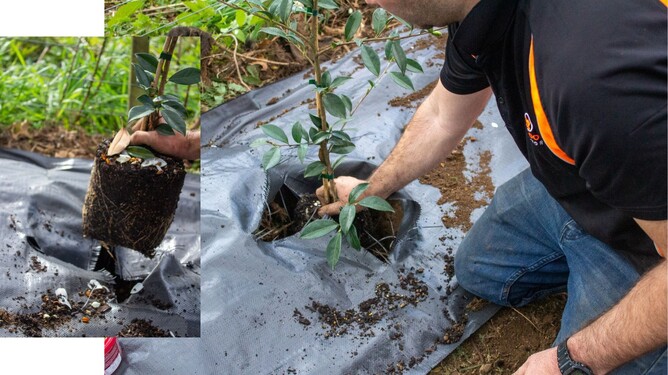
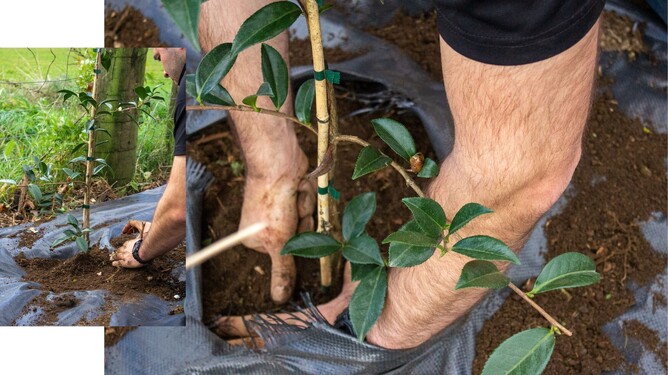
Step 9: Add The Tree In The Hole
Open the weed mat area to place the tree on the ground.
Tips:- Place the tree in the middle of the hole;
- Make sure the tree sits upright;
- When planting multiple trees for a hedge, position the tree so the limbs face sideways so they can eventually reach one another when growing (this will help to achieve a screen sooner).
Step 10: Add Slow-Releasing Fertiliser
Add slow-releasing fertiliser tabs to the bottom of the hole to stimulate root growth.
Step 11: Add Soil
When filling the hole with soil, follow these steps:
- Add 30-40mm of loose soil to the bottom of the hole and lightly compact it before placing the plant in the spot. This will allow the roots to penetrate the ground easily.
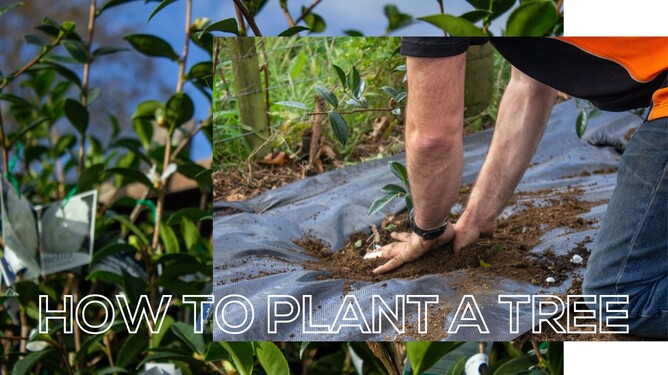
- Place plant in the hole. Once in the hole, working in layers, place soil in the bottom around the plant's roots and gently compact using your clenched fist and thumbs. Press down firmly. Continue in layers ensuring the root ball is firmly in place.
- In layers, bring the soil level up to the top of the root ball.
Tips:
- Ensure the trunk doesn’t have soil touching it, and there is only a thin layer of soil on the top of the root ball. This will ensure the trunk does not become too wet, which can cause decay.
- Ensure the top of the root ball is at ground level, so the tree isn't planted too deep.
- Do not over compact. Never use your feet to compact the soil, only use your hands.
- Never push down on the root ball as it may damage the young, fine roots.
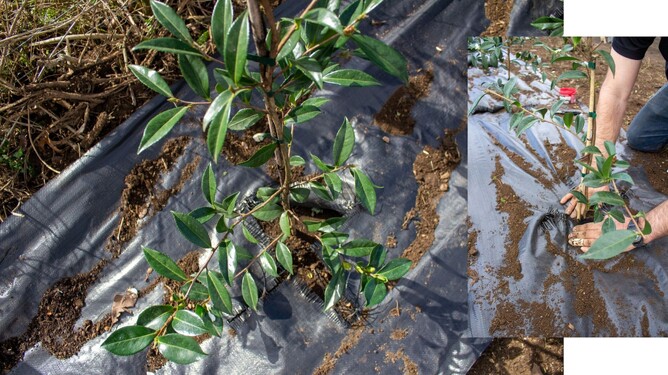
Step 12: Cover With Weed Mat
Cover it with the weed mat when the hole is full of soil.

Step 13: Add Mulch
Adding mulch to your young trees is essential. It will hold and maintain moisture, so you don’t need to water them constantly.
Mulch also slowly releases nutrients down to the roots when it rains.
Tips:- Add mulch around the tree’s base, ensuring it does not touch the trunk.
Don’t forget to water the trees after planting them.
If you need to learn more about maintaining your young trees as they grow. Find out how-to here.
If you are thinking of planting new trees on your property and don’t know where to start, we are one email or phone call away.